Part 2 was all theory and whiteboard. Two border routers in two VPS providers, two edge routers at home, WireGuard between all of them, OSPF for liveness, iBGP to carry the prefix. Nice boxes, nice arrows (but i have a bone to pick with you Mermaid…)
Now let’s actually start building the thing! “the diagram makes sense” and “packets are arriving” turned out to be full of small, stupid, extremely time-consuming problems.
Getting CHR onto a VPS
First problem: neither Vultr nor HostHatch has a “MikroTik” button. You get Debian, Ubuntu, or a custom image but only in Vultr.
The trick that works everywhere is that MikroTik publishes CHR as a raw disk image. So you boot the VM into anything Linux, and you overwrite the disk out from under the running OS. Sounds ridiculous, but it works! In the end, it’s all a x86 machine, and as long as the NICs work with the hypervisor drivers, you’re golden.
For Vultr this was easy, as you can start from a snapshot that’s basically a block-level disk image. You grab the CHR’s latest x86 image from MikroTik’s site, use that as the snapshot, and start up the VM. You boot into the console with a single NIC.
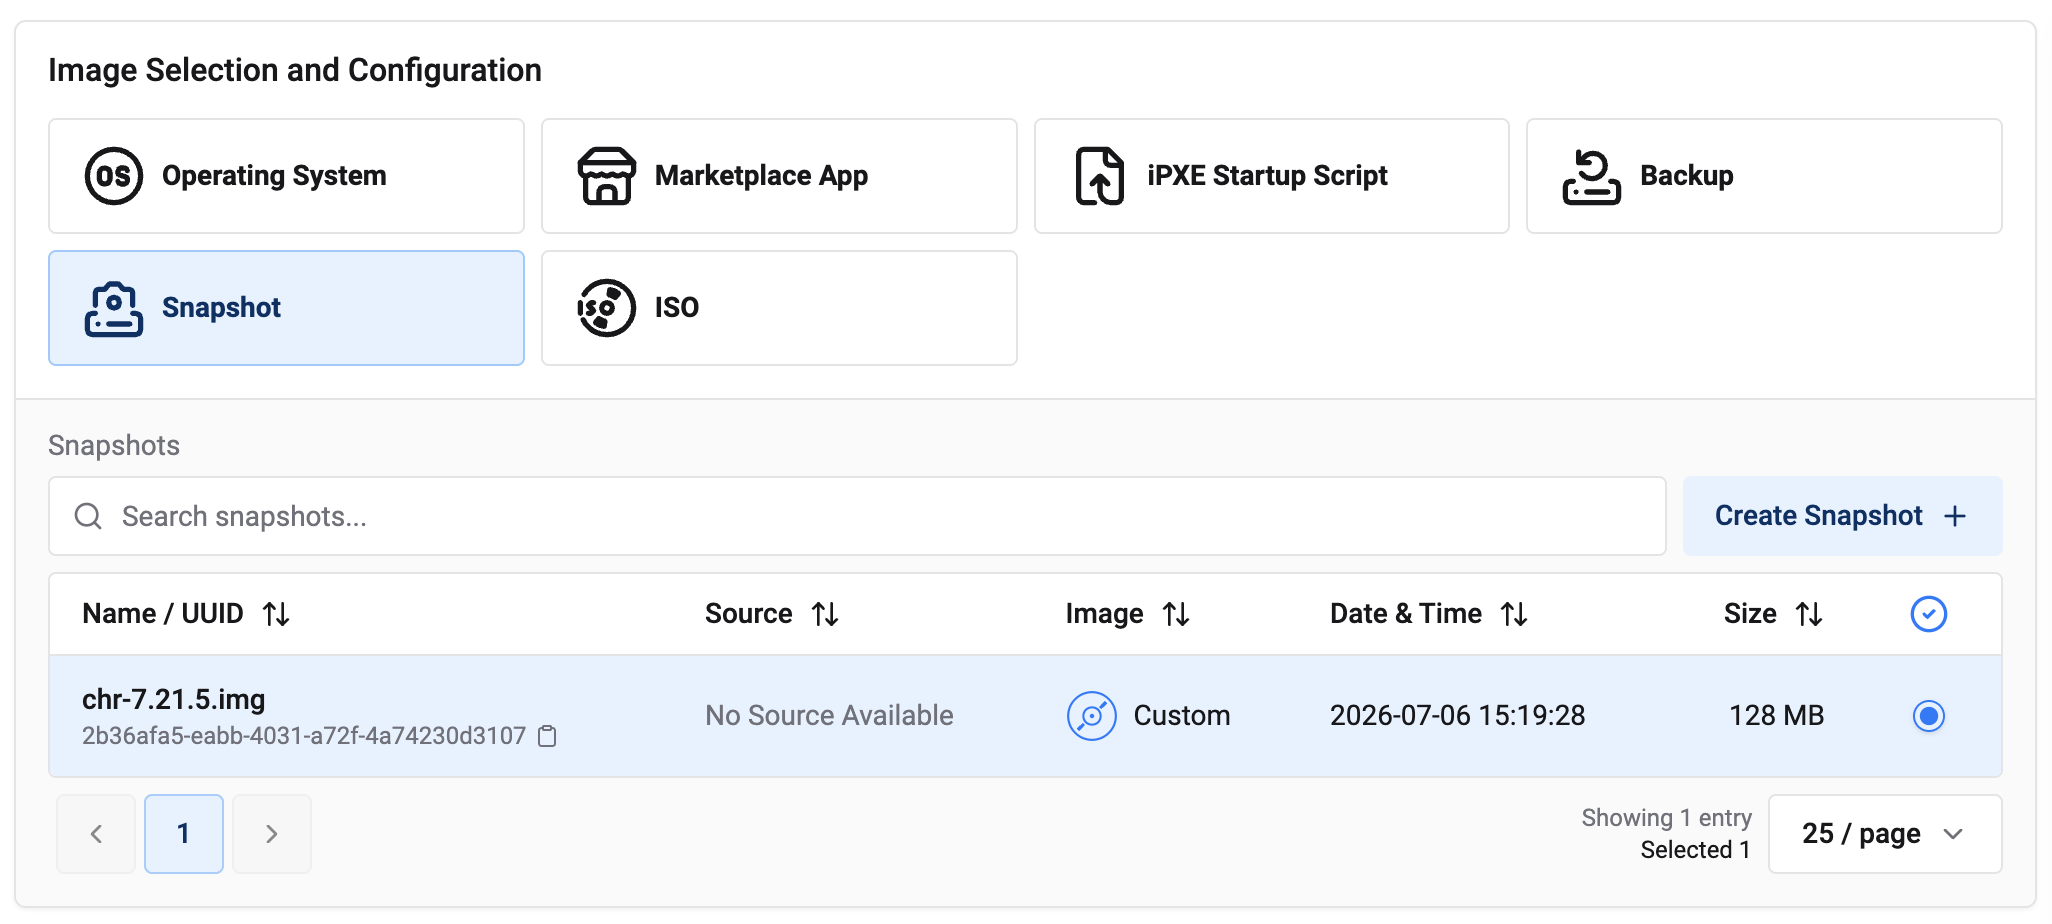
For HostHatch, below are the steps I used starting with a Debian image, and doing this from the Console. Any VPS with console access should be compatible with the process though.
We’ll be basically rebooting to mount the root filesystem read-only, dd’ing CHR over the block device, syncing, and force-rebooting. Doing it “live” gets you in a race condition with the running OS dumping data like logs. I tried doing dd multiple times while the OS was still running and I ended up with an unbootable corrupted image.
wget https://download.mikrotik.com/routeros/7.x/chr-7.x.img.zip
unzip -c chr-7.x.img.zip > /tmp/chr.img

# check your disk name, usually /dev/sda
lsblk

# Edit the grub boot file
nano /etc/default/grub

# Set the following on GRUB_CMDLINE_LINUX
GRUB_CMDLINE_LINUX="init=/bin/bash"

# Save and exit, then update grub with our changes and reboot
update-grub
reboot

# After the reboot, this is all from the virtual console
# Make sure / is read-only, we want it untouched
mount
mount -t tmpfs tmpfs /dev/shm 2>/dev/null || (mkdir /dev/shm && mount -t tmpfs tmpfs /dev/shm)

# We copy the CHR image out of the main volume into a tmpfs in ram, then write from there
cp /root/chr-7.19.4.img /dev/shm/
dd if=/dev/shm/chr-7.19.4.img of=/dev/vda bs=4M oflag=direct status=progress
sync

# Hard reboot the thing (or use the provider's hypervisor hard reboot)
echo 1 > /proc/sys/kernel/sysrq
echo b > /proc/sysrq-trigger
A few things that will bite you here:
- Get console access open before you press enter. If the VM comes back with no IP you cannot SSH into it. Vultr and HostHatch’s web console saved me quite a few times. Serial console would also be ok too.
- Vultr hands out addressing over DHCP, so CHR mostly just comes up. HostHatch is static, so it comes up with nothing and you get to type the address, gateway and routes into a browser console by hand.
- Everything is on ether1 and the default config is basically empty, so that’s super nice. No firewall, no NAT, no bridge nonsense to unwind.
Then you paste in your license key, or run it free capped at 1Mbps per interface while you build (or get a trial).
Before you do ANYTHING else, log in with WinBox or SSH and CHANGE YOUR PASSWORD and ideally lock down management sources either via the provider or from the CLI. This is always what I do FIRST on the CHRs otherwise someone else could take it over.
My configuration builder script takes care of all of that for me now, and I’ll eventually share the code for it so configs and refreshes are easy. Automated, remember?
Loopbacks first
Before any tunnels, every router gets a loopback. In RouterOS “loopback” IP address can be configured by creating a dummy bridge interface without any ports and adding the address to it:
/interface/bridge/add name=loopback0
/ip/address/add address=203.0.113.241/32 interface=loopback0
This is the single most important address on the box, and getting it in place early saves pain later. Every iBGP session sources from it, every router is identified by it, OSPF advertises it, and it is the one address on the router that doesn’t disappear when a link dies. A router’s identity should not depend on which of its interfaces happen to be working today.
And yes, that’s a public address on the loopback, out of my own /24. Same goes for the tunnel links, which get /31s from the same block.
This may surprise people who come only from enterprise networks, where infrastructure addressing is RFC 1918 by reflex (and in large enterprises, you’ve got squat-space, don’t get me started).
However, here it’s the right call for a few reasons, one of them is PMTUD: when a router generates ICMP fragmentation-needed, it sources that packet from whichever interface faces the sender, which for transit traffic here will be a tunnel link. If that address is private, the ICMP may be dropped somewhere upstream by anti-spoofing filters, the sender never learns to shrink its packets, and you’ve built a PMTU black hole on purpose. Infrastructure addresses in a transit path have to be routable or path MTU discovery just doesn’t work. Once you’re past the Edge layer into your stateful firewalls, you can use all the privates you want because NAT becomes a thing.
My other justification for public addressing in loopbacks and P2Ps is pretty traceroutes. Anything through my AS answers at every hop, with rDNS I control, so people see actual router names instead of a wall of asterisks or names that can’t be looked up against a PTR record.
The downside is that it eats part of the block. Eight tunnel links plus loopbacks runs about a /27 out of a /24 I already wish were bigger. The full addressing plan gets its own post just because there’s a lot of info there.
Now the tunnels
Both edge routers need to reach both border routers, over both home WANs. That’s 2 ERs x 2 BRs x 2 WANs, so eight tunnels, and every one of them is a separate WireGuard interface with its own keypair and its own /31.
Every tunnel is dialed from home. The ERs have an endpoint-address configured for the tunnels pointing to the BRs, but the BRs never do. The BRs just listen and learn where their peer is from the first matching handshake. On my last post I mentioned why WireGuard, and one reason is because my 5G backup is behind CGNAT, so that side has no reachable address for anyone to dial into. The inside (ERs) initiates, and then persistent-keepalive holds the pinhole open so the carrier’s NAT doesn’t drpop the mapping after 30 seconds of no packets.
/interface/wireguard/add name=wg-br1-wan1 listen-port=51821 mtu=1360
/interface/wireguard/peers/add interface=wg-br1-wan1 \
    public-key="..." endpoint-address=1.2.3.4 endpoint-port=51821 \
    allowed-address=0.0.0.0/0 persistent-keepalive=25s
Ports have a meaning here
On the border routers, the listen port encodes which home WAN the tunnel rides. Tunnels from my primary WAN land on one port, tunnels from 5G land on another, both from the same source IPs.
Both tunnels from a given ER arrive at the BR from… whatever addresses the carriers feel like using today, one of which is a CGNAT pool address that changes, so the source address tells me nothing, but the port does, and it’s in the interface name, in the logs, and in the OSPF neighbor list. When I’m looking at a flapping neighbor at 11pm I can tell which physical path is giving me shit without looking too deep.
Free self-documentation for the cost of picking sensible port numbers.
0.0.0.0/0 (and also later on ::0/0)
WireGuard’s allowed-address of 0.0.0.0/0 here is doing two jobs at once: it’s the crypto-key routing table (which peer out of the connection do I encrypt this to) and it’s the inbound filter (what source addresses will I accept from this peer). With one peer per interface, the first job is meaningless because there’s only one peer per connection where traffic can go. And I need OSPF’s multicast hellos to 224.0.0.5 to survive the trip, which they won’t if allowed-address only covers the /31. Eventually I’ll get to layer in IPv6, so we’ll have double the peers, and now use ::0/0 as the allowed…
So: one peer per interface, allowed-address wide, and let the actual routing table decide what goes where. If you cram multiple peers onto one WireGuard interface, this stops being true and you’ll be debugging why traffic poofs away into the wrong tunnel.
MTU, AKA the evening I lost
Mentioned this in Part 2, but I’ll relive it just for shits and giggles and science.
WireGuard adds 60 bytes of overhead per packet for IPv4 (outer IP header, UDP header, and WireGuard’s own type, key index, counter and auth tag). So on a clean 1500 byte path, your tunnel MTU is 1440.
However, my 5G path is not a clean 1500 byte path. Nothing on a cell carrier network ever is, so you have to measure it by pinging with the don’t-fragment bit set and walking the size down until packets stop coming back, like:
/tool/ping address=1.1.1.1 do-not-fragment=yes size=1420
Then subtract 60, and THAT’S your ceiling. And then you use that number on EVERY SINGLE TUNNEL in the fabric, including the ones over Comcast that could happily carry more. This felt wrong to me… why cripple the good path?
Because a TCP flow that establishes over Comcast and then fails over to 5G mid-connection keeps using the MSS it negotiated at the start. It doesn’t renegotiate, so it fails over “successfully”, OSPF reconverges in under a second, everything looks perfect, and that one flow just silently stops passing data. Lowest common denominator across all tunnels, or you get failover that works for pings and breaks for real traffic.
Two more things that are not optional:
Clamp MSS. PMTU discovery depends on ICMP getting back to the sender, and out on the real Internet plenty of networks eat ICMP for breakfast.
/ip/firewall/mangle/add chain=forward protocol=tcp tcp-flags=syn \
    action=change-mss new-mss=clamp-to-pmtu
Don’t block ICMP fragmentation-needed on your own routers. If you’re writing a tight input chain (and you should be BTW, don’t want open MikroTiks out there), make sure ICMP type 3 code 4 gets through. Blocking it is how you build a network where ping works, SSH works, and then many site hang forever while you question your life choices.
For those that may never implement any of this but still troubleshoot stuff, that last symptom (pings work but sites hang, and even that is random) is the tell for every MTU problem. Small packets fine, big packets gone, so anything interactive works and anything that transfers data dies. If you ever see “works except for that one site,” it’s MTU. It’s always MTU, just like it’s always DNS.
Oh hi OSPF, hello!…
Back to the constraint from Part 2: a WireGuard interface never goes down. It’s a virtual construct. The far end can be powered off, on fire, flooded, repossessed, and your local interface still says running. There’s a last-handshake value you could poll, but that’s about it, it’s like a packet counter delta.
So a routing protocol must be the liveness detector. OSPF hellos go down every tunnel, and when hellos stop, the adjacency drops, the routes get pulled, and traffic shifts. Every tunnel gets network-type=ptp which skips DR/BDR election. There are exactly two routers on a point to point link and having them hold an election about it is a FWOT.
The other job OSPF does here is expressing WAN preference as cost. Comcast tunnels get a low cost, 5G tunnels get a high one. That’s the entire failover policy, one number per interface. BGP never learns which physical link anything rides, which means the day I want to promote 5G, or add a third WAN, or run both at once, it’s just a metric change in OSPF.
BFD, carefully
Default OSPF timers give you a 40 second dead interval, which is a long time to be blackholing traffic. BFD can get that down to well under a second.
It also gave me my first self-inflicted outage. I set the timers aggressively on both WANs and the 5G tunnels started flapping every time the carrier had a bad minute (which was pretty regularly). That flapped OSPF, which flapped the routes, which was substantially worse than just having a slow-ish failover. When doing failover testing and killing Comcast, the 5G would be pretty shit because it’s not just higher latency anymore, but it’s routes vanishing and reappearing a few seconds later.
So: tight timers on the tunnels I trust, relaxed timers on the one that rides a cell tower. If BFD gets me closer to failover than OSPF, then it does its job. I’m not running prod stuff over here, just want to feel like I am sometimes.
iBGP over the loopbacks
OSPF’s job is done at this point: every router can reach every other router’s loopback, over whichever tunnel is currently healthy. THAT’S THE JOB. So iBGP just sits on top of that and never thinks about tunnels at all.
Full mesh between all four routers, six sessions, sourced from loopbacks:
/routing/bgp/connection/add name=ibgp-er1 remote.address=203.0.113.242 \
    remote.as=394XXX local.address=203.0.113.241 local.role=ibgp \
    router-id=203.0.113.241
Full mesh at four routers is completely fine. Route reflectors are the answer at scale and are absolutely not the answer here, for reasons that are interesting enough that they’re getting their own post later. Short version: I tried and built a forwarding loop.
Keeping these three jobs separate is what makes the whole thing debuggable, so we end up with our protocol sandwich:
flowchart TB
    A["iBGP over loopbacks<br/>carries my prefix"]
    B["OSPF + BFD over tunnels<br/>reachability + liveness + WAN preference"]
    C["WireGuard tunnels<br/>encryption + NAT traversal"]
    D["Two home WANs to two VPS providers"]

    A --> B --> C --> D
Each layer only talks to the one below it. When something breaks, you start at the bottom and walk up, and the first layer that’s unhappy is your answer. I cannot overstate how much time this saves compared to a design where BGP knows about interfaces.
The moment it worked
Sessions up, prefix in the table, and then you go look at yourself from the outside.
bgp.tools, RIPEstat, whatever looking glass you like. There’s my prefix, there’s my ASN as the origin, and there are two upstream ASNs pointing at it. Propagation was quick once filters were lifted (remember, 24-48 hours for a reason), and a removal/reinstall was also quick, about 2 minutes for global convergence.
Then the actual test, which is pinging an address in my own block from my phone on cellular, and having it answer, and knowing the path is: phone, carrier, Internet transit, a VPS in a datacenter, a WireGuard tunnel, a cable modem in my basement, and virtual routers next to the sump pump in a noisy rack.
That’s the thing I’ve wanted since Part 1. It works!!!
It’s always a work in progress…
The fabric is up, failover works, I unplugged things in every order I could think of and traffic kept moving. I’m done?
But then… the prefix origination is still at home (the mistake I flagged at the end of Part 2). Right now the /24 lives in the world because my EDGE routers say so, and the border routers are just passing that along, which means my announcement is only as reliable as my house infrastructure (which it mostly is because I achieved over 500 days uptime on my L3 ToR stuff, but Resilience, remember?).
It would work great most of the time, but going on 5G with a flappy link means you’re flapping the entire /24 on the global internet table, and that’s just funny to think about. Not a good citizen.
Next up, Part 4: moving origination to the border, the anchor route, and how to make sure a permanently announced prefix doesn’t quietly become a black hole… And THEN we’ll get to automating this all with a config generator and ansible deployment scripts.